|
Material List:
2 x 4 x 8': Three pieces
1 x 12 x 8' Board: One piece
5/16" Wood Plugs: 20
2.5" Wood Screws: 24
Polyurethane
Wood Glue
Tool List:
Measuring Tape
Pencil
Compass or Circle Template
Table Saw
Miter Saw
Band Saw
Sander
Router w/1/4" Round Over Bit
Drill/Screw Gun
1/8" drill bit w/5/16" Counter Sink Shank
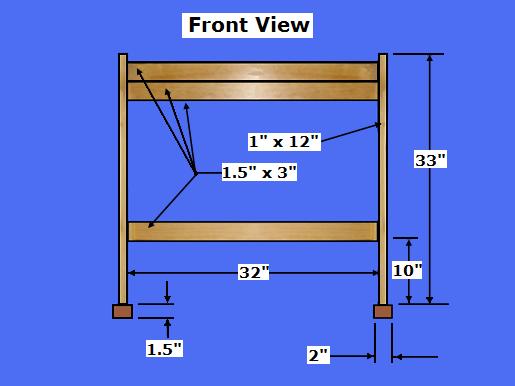
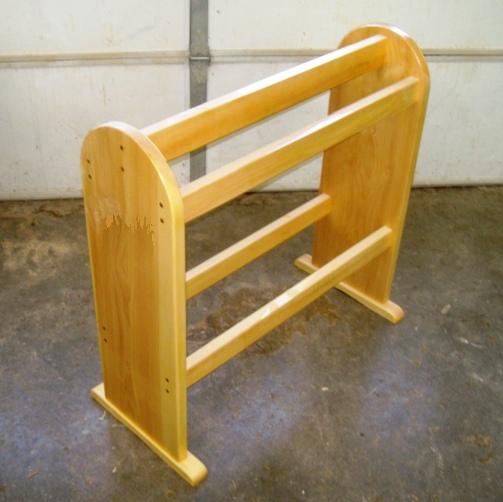
Step 1, Cut the Blanket Rack Pieces - Select the Materials.
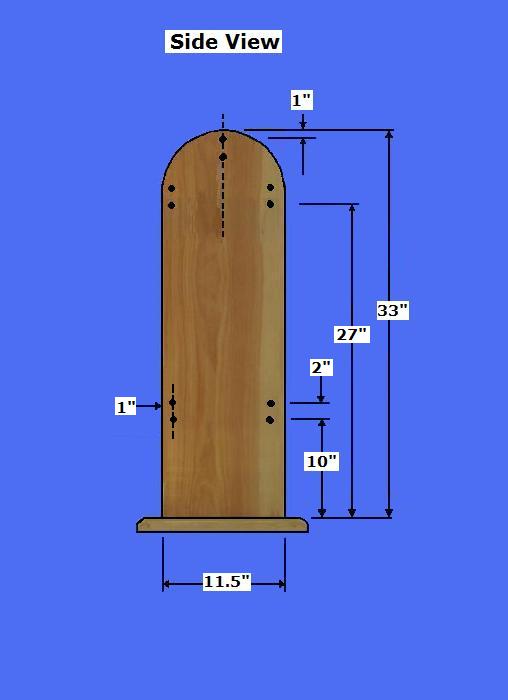
Select the 1 x 12 (11.5"): Using a Miter Saw,
crosscut two pieces @ 33" for the Side Panels. Using a compass and paper for a
template, make a 11.5" Semi-circle at the top of the two boards. Using a
Band saw, cut the rounded tops of each Side Panel. Using a drill w/1/8"
bit w/5/16" Plug Cutter, mark and cut the screw holes to receive the Cross
Braces and 5/16" Plugs, as shown above. Using a Router w/1/4" Round-over Bit, router the top and
side edges (Not the bottom edge).
Select the 2x4's: Using a Miter Saw, cross cut
five pieces @ 32" for the Cross Braces. Using a Table Saw, rip the Braces
to the dimensions, as shown above. Using a Router w/1/4" Round-over Bit,
router the top and bottom edges (Not the side edges).
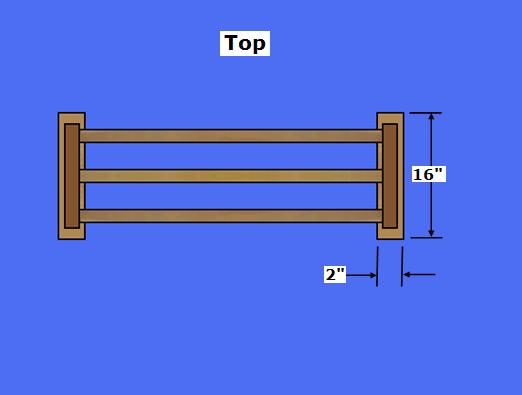
Select a 2x4: Using a Miter Saw, cross cut two
pieces @ 16 inches for the Bottom Strips. Using a Table Saw, rip the Bottom
Strips to the dimensions, as shown above. Using a Band Saw, round off each end
of the two Bottom Strips. Using a drill w/1/8" bit w/5/16" Plug Cutter,
mark and cut the screw holes on the bottom side of the two strips, as shown
above. Using a Router w/1/4" Round-over Bit, router the top edges (Not the
bottom edges).
Select all the cut pieces and sand them.
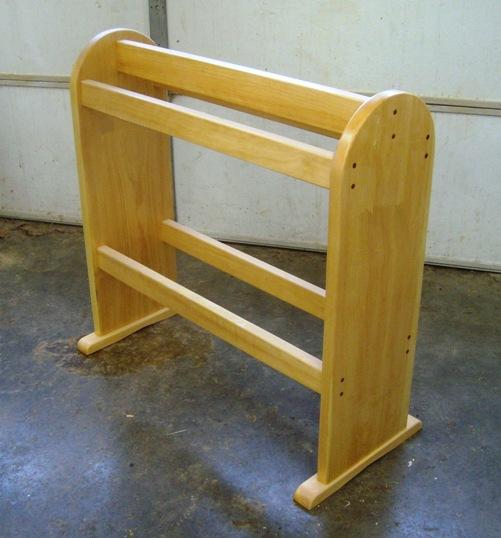
Step 2, Assemble the Quilt Rack- Select all pieces
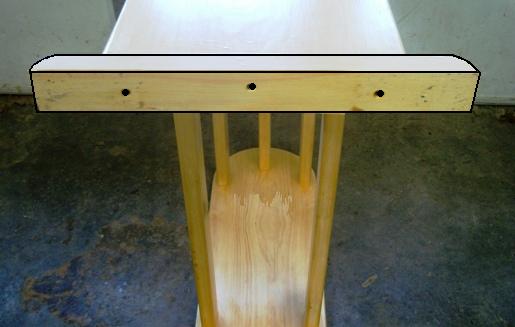
Select the Side Panels and Cross Braces; Using glue and
screws, attach the Braces to the Side Panels.
Select the 5/16" Plugs; using glue, insert the Plugs into the screw holes of the Side Panels.
Select the Bottom Strips; Using glue and screws, center and attach the Bottom Strips to the Side Panels,
as shown above.
Step 3, Finish the Blanket Stand- Perform a final sanding and Poly the finished stand.
| 

