|
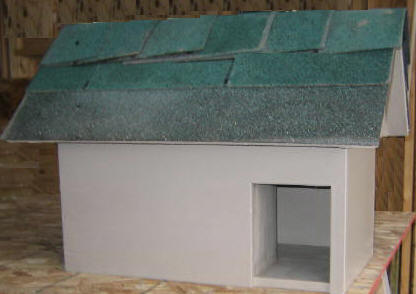
Building a cat house is a
project that can be fun and practical. This
simple doghouse for cats can be customized
to
house a larger feline. You can build this
house
from one, 3/4" x 2' x 4' and one, 1/2" x 4 x 4 plywood panel plus a few other
necessities.
Material List:
If ole barn boards are not
available, use one piece of 3/4" plywood, 2' x 4', for
the Bottom Base and the Right/Left Side panels.
One piece of 1/2" x 4' x 4' plywood
for the Front, Back base panels and the roof pieces.
One piece of 1" x 6" x 48" piece of
pine.
1 5/8" Woodscrews.
Six, three-tab Shingles.
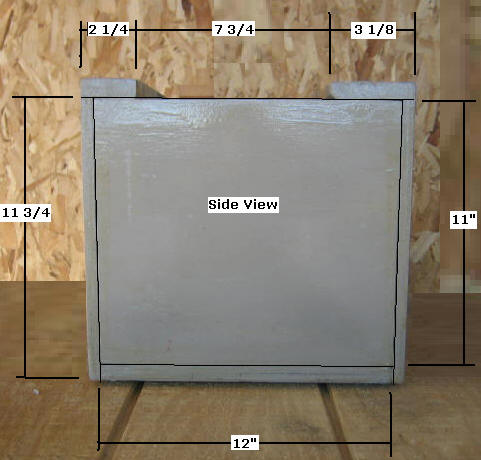

Step 1, Cut the House Base Pieces -
Select 3/4" x 24" x 48" plywood panel; crosscut the
panel in half (two squares @ 24" x 24").
Select one of the halves and rip it
in half (two rectangles @ 12" x 24"); one of these panels
will be the Bottom, Base panel.
Select the other half, 12" x 24"
rectangle; crosscut this one in half (two squares @ 11" x
12"); these two squares will be the Left/Right Side panels.
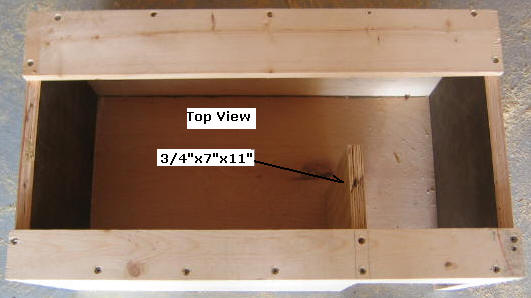
Select 3/4" plywood; cut out a
rectangle @ 7" x 11" for the wall divider.
Select the 1/2" x 48" x
48" plywood; Cut out two rectangles @ 12" x 24" for the
Front and Back panels. Select the Front panel and cut
out the doorway.
Select the 1 x 6 x 48" pine;
Cut out one piece @ 2 1/4" x 24 and one piece @ 3 1/8" x
24"; these will be used as the top braces.
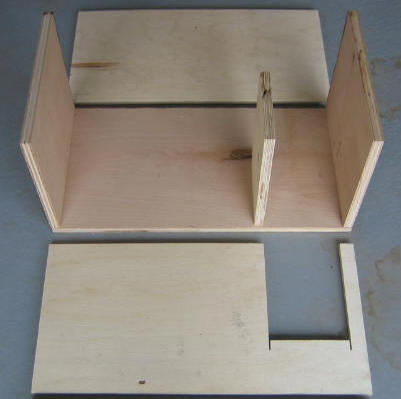
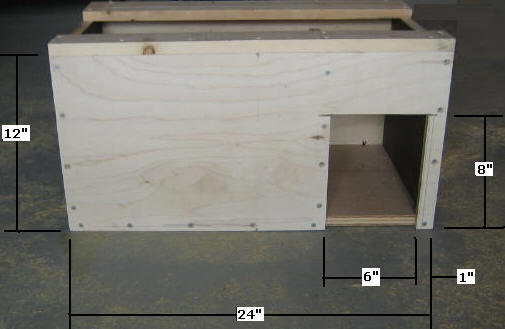
Step 2, Assemble the Base -
Select the Bottom, the Front, Back, Divider, Top Braces, and two Side panels;
attach them with 1 5/8" screws as shown above (pre-drill and
counter sink each screw hole).
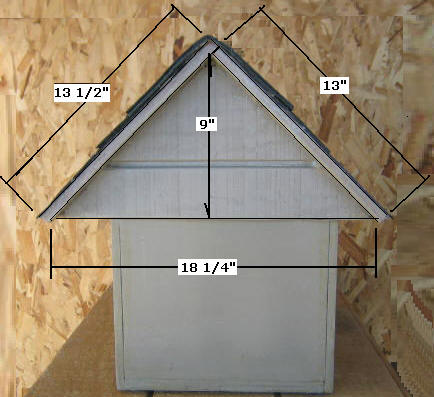
Step 3, Cut the Roof Pieces - Select
the 1/2" plywood; cut two right triangles @ 18 1/4" x
9" as shown above for the roof end pieces.
Select 1/2" plywood; cut two
rectangles; one @ 13 1/2" x 28" and one @ 13" x 28" as shown
above for the roof tops.
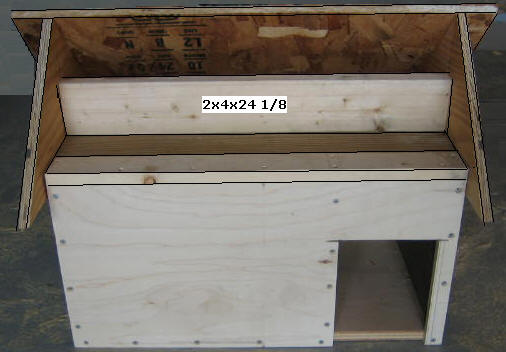
Select 2 x 4 and cut it to 24 1/8"
for the roof support piece.
Select 3/4" plywood; cut one
rectangle @ 24 1/8" x 7 1/2" as shown above for the Roof
Base.
Step 4, Assemble the Roof-
Select the 24 1/8" x 7 1/2" Roof base and the 2 x 4 x 24
1/8" Roof Support piece and attach the 2x4 to the 3/4"
plywood on center as shown above
Select the two Roof End triangles
and attach them to the Roof Base/Support pieces; allow the
bottom of the triangular ends to hang 1" below the Roof
base.
Select 1/2", two rectangles; one @
13 1/2" x 28" and one @ 13" x 28" roof tops and attach them
to the triangle ends as shown above with the two inch
overhang on each end.
Select tar paper and shingles and
apply.
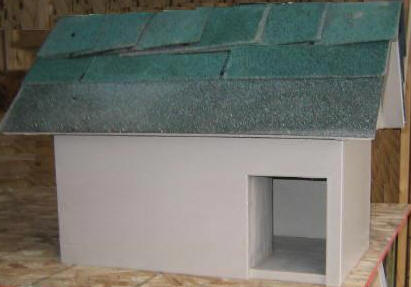
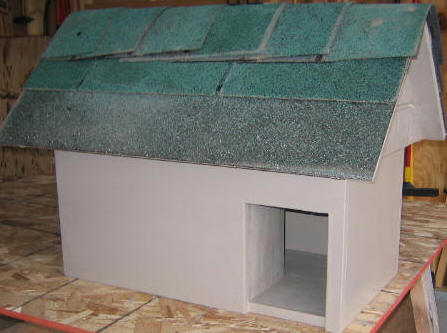
Step 5, Finish the House- Apply
edging material, fill all holes with wood plugs and/or filler, sand, and apply
stain/poly or paint; seal the floor against moisture.
Once the poly has cured, apply carpeting to the floor and a
flap door. Find your cat and stick it in there.
|