|
Material List:
3/4" Plywood 8" x 60": One piece per drawer
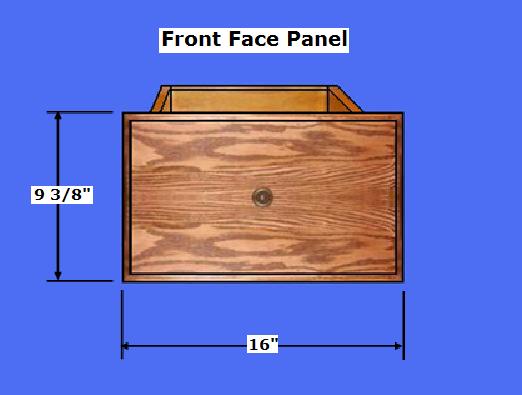
1" Solid Wood: 9 1/2" x 16": One piece per drawer for
Front Face Panel
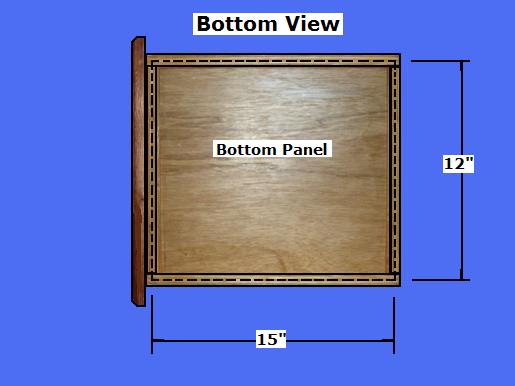
1/4" Plywood: 15" x 14" : One piece per
drawer for Bottom Panel
1.5" Wood Screws: 12 per drawer
1 1/4" Wood Screws: 4 per drawer
5/16" Wood Plugs: 12 per drawer (optional)
Polyurethane
Wood Glue

Tool List:
Measuring Tape
Pencil
Table Saw
Miter Saw
Palm Sander
Router w/1/4" Straight Bit and an Ogee Bit or desired
edging bit
Drill/Screw Gun
9/64" Tapered drill bit w/5/16" Counter Sink Shank
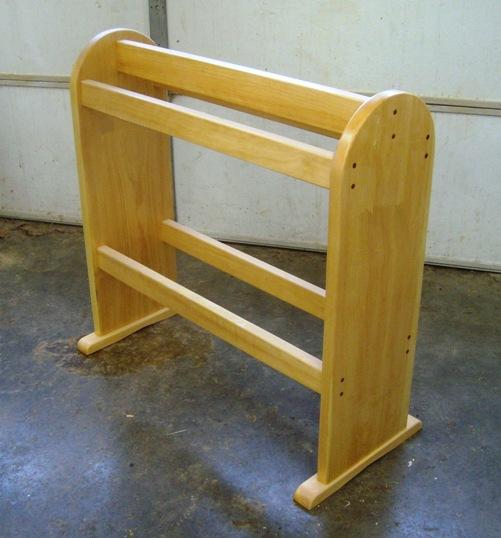
Step 1, Cut the Drawer Pieces - Select the Materials.
Determine the desired size of the drawer opening; my
opening was:
Width: Face Frame Opening = 15 1/4"
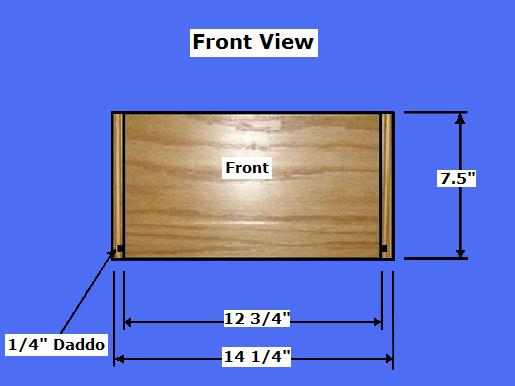
(Allowing 1" for drawer glides (1/2" on each side), the completed Drawer width
is 14 1/4".
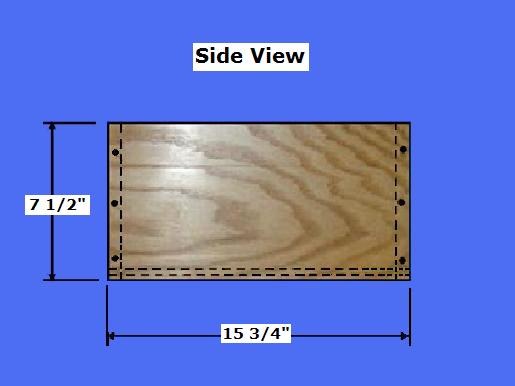
Height: Face Frame Opening = 8 1/2" (Allow 1/2"
clearance top and bottom), the completed Drawer Height is 7 1/2".
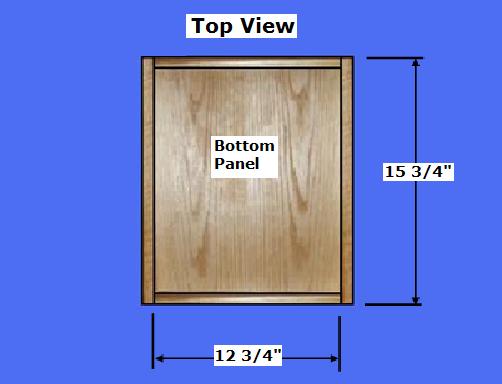
Depth: From the Front of the Face Frame = 16"
(Allow 1/4" to the back panel of the cabinet holding the drawer), the completed
Drawer Length is 15 3/4".
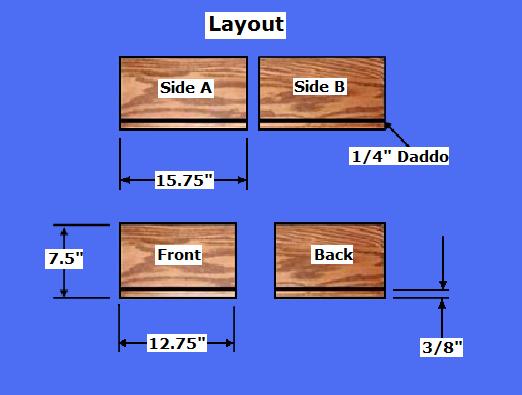
Select the 3/4" Plywood: Using a Table Saw,
rip the plywood to the height of the drawer, 7 1/2".
Determine the interior side of the drawer material.
Using a Table Saw, on the interior side, 3/8" from the lower edge, cut a 1/4"
dado x 3/8" deep to receive the 1/4" Bottom Panel.
Select the 3/4" x 7 1/2" Plywood; Crosscut two pieces @
15 3/4" for the Side Panels. Crosscut two pieces @ 12 3/4"; one for the Front,
and one for the Back Panel.
Select the two, Side Pieces; Using a Drill with a 9/64"
Drill Bit with a 5/16" Countersink bit, drill six holes on each of the exterior
sides (place the bottom holes above the dado slot).
Select the 1/4" Plywood; Using a Table Saw, cut the
Bottom Panel @ 15" x 12" (confirm this measurement).
Select the 1" Solid Wood material; Using a Table Saw,
cut the Front Face Panel @ 9 3/8" x 16". Using a Router with a desired
edging bit, router the four edges.
Select all the cut pieces and sand them.
Step 2, Assemble the Drawer- Select all pieces
Select the two, Side and Front Panel; Using glue and
1 1/2" screws, attach the two Side Panels to the Front Panel.
Optional: Select the 5/16" Plugs; using glue, insert the Plugs into the screw holes of the
Side Panels
and sand them flush with the side panels.
Select the Bottom Panel; Slide it into the dado slot.
Select the Back Panel; Using glue and screws, attach the
two, Side Panels to the Back Panel.
Select the Finished, Face Front Panel; Using four, 1
1/4" Screws, center and attach the Face Panel to the front of the Drawer
(pre-drill the holes from the interior).
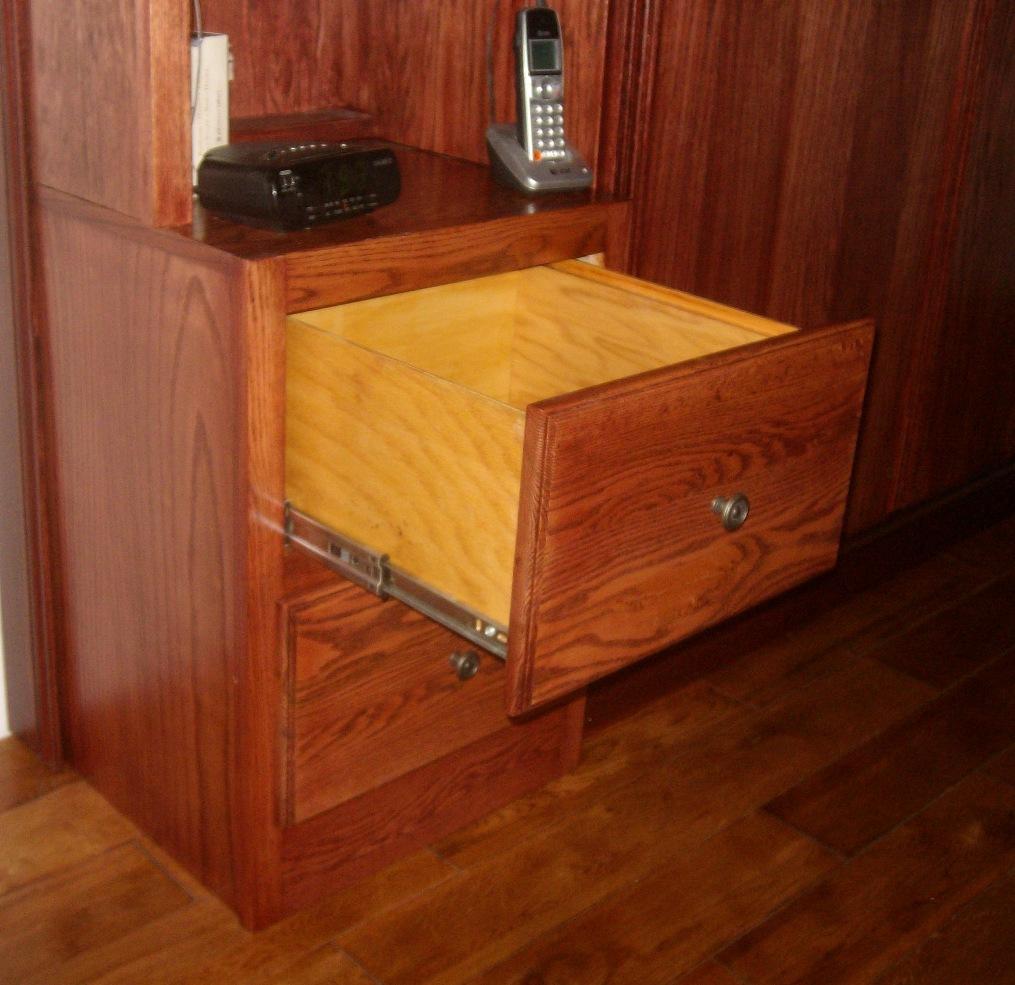
Step 3, Finish the Drawer- Perform a final sanding and Poly the finished
Drawer; add a drawer-pull of your choice.
Select the Drawer Glides; attach them per the
manufacturer's instructions. |