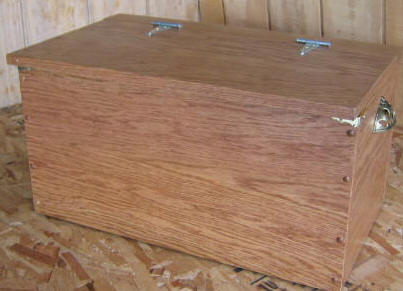
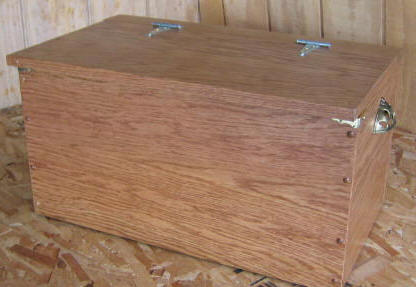
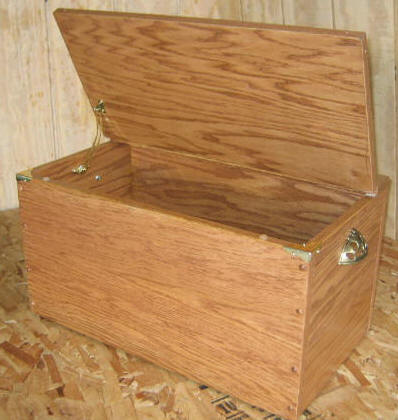
Building a wooden toy box is a
project that can be fun and practical. This
simple, butt-jointed toy box can hold a good number of
small toys or it can be customized
to
build a larger one. You can build this
toy box
from one, 3/4" x 2' x 4' plywood panel plus a few other
necessities.
Material List:
If ole barn boards are not
available, use one piece of 3/4" hardwood plywood, 2' x
4', plus
matching edging material.
One piece of 3/8" x 2' x 2' plywood
for the bottom panel.
One piece of 1" x 3" x 24" piece of
hardwood.
1 5/8" Woodscrews.
Two hinges, one interior, lid support, brass
corners, wood plugs and/or wood filler, and two handles.
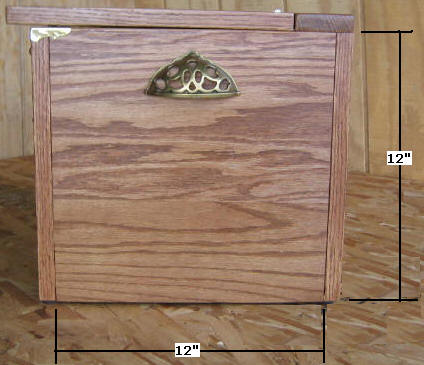
Step 1, Cut the Toy Box Pieces -
Select 3/4" x 24" x 48" hardwood, plywood panel; crosscut the
panel in half (two squares @ 24" x 24").
Select the two halves and rip each
in half (four rectangles @ 12" x 24"); three of these panels
will be the Front, Back, and Top panels.
Select the fourth 12" x 24"
rectangle; crosscut this one in half (two squares @ 12" x
12"); these two squares will be the Left/Right Side panels.
Select the 3/8" x 24" x 24" plywood;
crosscut this bottom panel to 23 1/2"; rip this panel to 12
3/4".
Select the 1 x 3 x 24" hardwood;
this will be used as the top brace.
Step 2, Assemble the Base -
Select the Front, Back, and two Side panels; set the 3/8"
dado blade to cut 3/8" deep; set the fence to 3/8"; cut the
dado slot as defined along the bottom edge of all four
panels.
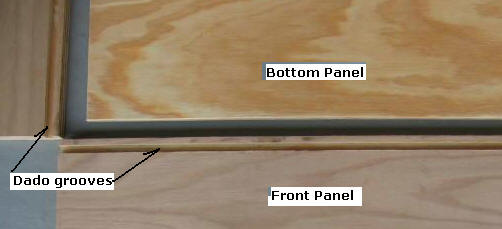
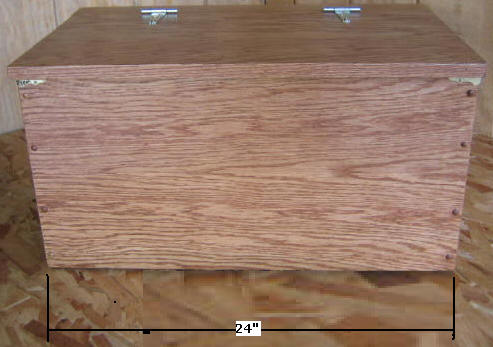
Select the Bottom panel and set it
in place with the other four panels (Front, Back, two
Sides); Use four, 1 5/8" screws to secure at each edge as
shown above (pre-drill and counter sink each screw hole).
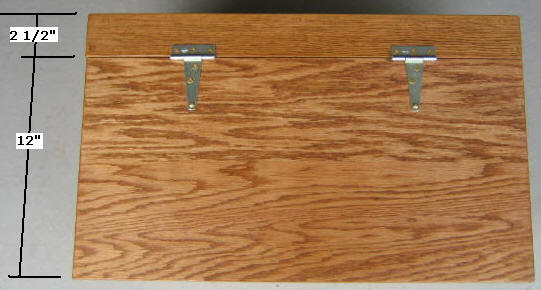
Step 3, Assemble the Top - Select
the 1" x 3" x 24" hardwood; attach it to the back edge of
the box as shown above with 1 5/8" screws (pre-drill and
counter sink each hole); select the 3/4" plywood top panel
(12" x 24"), position it in place with its overhang, and
attach the two hinges of your choice.
Select the interior lid support
bracket and attach it per the given instructions.
Step 4, Complete Toy Box- Apply
edging material, fill all holes with wood plugs and/or filler, sand, and apply
stain and poly. Once the poly has cured, apply pads or
wheels, brass corners, two handles.
|